|
There are four basic ways to execute commercial payments in our system, as
follows:
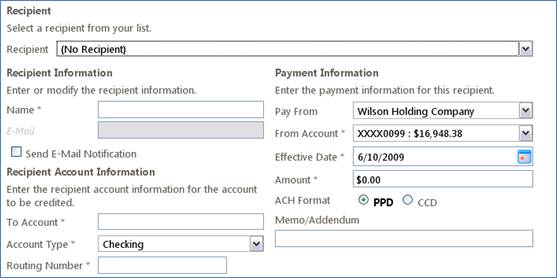
- Make a Single Payment to an Unsaved Recipient (i.e.
free-form payment entry).
If you need to make a one-time or recurring payment to a single
recipient that you will likely never pay again, you can enter the payment
directly into the payment page for the selected payment type. This
applies to single payment types only (i.e. Single Payment, Single
Receipt, and Wire Transfer). For example, if you need to make a single
payment to a contractor without saving the contractor as a recipient,
follow these steps:
- Ignore the drop-down ‘Recipient’ box, leaving the
selection as ‘No Recipient’.
- Complete the Recipient Information and Recipient Account
Information. If you want to send the recipient an email informing them
of this payment, check the box titled ‘Send Email Notification’ and
enter an email address.
- Complete the Payment Information.
- If a recurring payment, double-click on the ‘Enter Payment
Frequency’ panel or single-click on the double-carat on the right side
to expand the panel. Complete the details of the Recurring Transaction.
- Select ‘Continue’.
- Choose an action for the payment from the Transaction Preview
page.
Your payment to the recipient will be sent or scheduled, but the recipient
information WILL NOT be saved for later use.
- Make a Single Payment to a Saved
Recipient and Payment Template
If you need to make one or more different payments to a single recipient
on a regular basis, you will want to save the recipient information for
reuse on every payment, eliminating the need to re-enter the recipient
information every time or for every new payment type/template. This is a
convenience for single recipient payments. NOTE: Saving a recipient is
required to add a recipient to a batch payment (i.e. batch payment,
batch collection or payroll).
To make a payment to a single saved recipient, follow these steps.
- Save a Recipient and Payment Template under the Manage
Recipients menu.
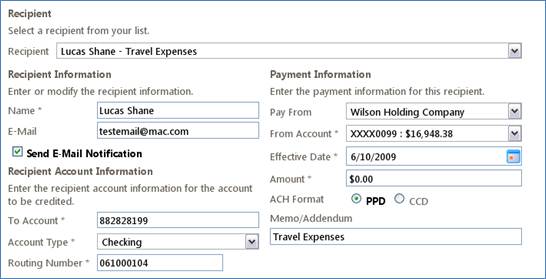
- Choose the saved recipient payment from the drop-down
‘Recipient’ box under the appropriate menu for the payment type, such
as a ‘Single payment’ or ‘Wire Transfer’.
- The recipient information in the stored recipient/payment
will be pre-populated on the page. If you want to change or override
any of the saved information, make any necessary changes.
- Select ‘Continue’.
- Choose an action for the payment from the Transaction Preview
page.
Your payment to the saved recipient will be sent or scheduled, and the stored
recipient and payment information is retained for later use.
- Make a Batch Payment to a Group of
Saved Recipients (currently not available)
For batch transactions including Payroll, Payments (Batch ACH Credits)
and Collections (Batch ACH Debits), your saved payment template for each
recipient is added to a batch of payments that you specify. The batch
name you select is automatically created upon the first payment added,
and automatically deleted upon the last payment removed. These batch
transactions can be thought of as a group of several ‘Single Payments’
or ‘Single Receipts’ that have something in common, like:
- Monthly Payroll/Bi-monthly Payroll/Bonus Payroll – payroll
credits for a group of employees.
- Monthly Dues/Quarterly Dues/Annual Dues – periodic debits
for memberships, home owner’s associations,
etc.
- Periodic payments – credits to pay vendors, pay monthly
bills/invoices, etc.
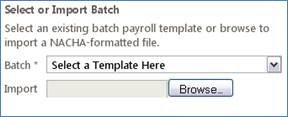
- Upload a Formatted Payment File or Batch
For
Payroll payment batches that include many, changing recipients, you can
upload a properly-formatted NACHA file or a comma separated values file from
the Payroll page. To upload a Payroll file, follow these steps:
- Click ‘Browse’ and navigate to the payroll file.
- The system will automatically validate the format and
content of the file, to include:
- The file is a NACHA-formatted file or a CSV file.
- The user has the right to draft a payroll transaction.
- The transaction is within the user’s assigned rights and
limits.
- The offset (debit) account is one of the user’s entitled
online banking accounts.
NOTE:
If the file does not have a valid offset or debit account, subsidiary
information, or effective date, the system will prompt you to select one for
each missing element and will insert it into the ACH file.
|